
Recharge Your RV Camper Batteries With Solar Panels
I travel fulltime in my RV, and I like to spend time out in the boondocks. I boondock 95% of the time, which means that I have no hookups, not even water.
A big reason that some people have trouble boondocking for an extended amount of time is that their batteries run low. A great rule of thumb is to keep your deep cycle lead-acid batteries above 50% state of charge, and if you run the 12V water pump, furnace, and lights in your RV camper, it won’t take long until the battery indicator says it’s at 1/2.
Related Post: Best Solar Panels For Prewired Zamp Trailers / Use Panels With A Furrion Solar Port
Some people run their furnaces all night and wake up with a dead battery, then wonder why they have to buy new batteries every year.
What I ended up doing was buying solar panels, but how many solar panels do you need to recharge your RV batteries? Let’s talk about it in an easy to understand way.
How Big Are Your RV Batteries?
How many solar panels you need, or how big it needs to be, depends on how big your battery is.
If you have upgraded your RV batteries to AGM, then you probably know how many amp-hours it is, meaning the battery capacity in amp-hours. If you have no idea how big your batteries are, I recommend reading this post over on KOA.
In short, your battery might not tell you how many amp-hours it can store, but if you can find the reserve capacity (RC), or how many amps it can deliver for X amount of hours, you can find out with some math.
If you have the RC number, multiply it by 60 percent, for example, 100min*0.6=60Ah.
If it tells you how many amps it can deliver for how many hours, you’ll just multiply the two. For example, 5 amps for 20 hours = 5*20=100Ah.
We can also turn these amp-hours into watt-hours. 100Ah*12V=1200Wh.
It’s very possible that you have two 12V batteries wired in parallel. This means that there is a connection between both positive terminals on the battery. Then there is also a connection between the negative terminals, separate from the positive.
What this does is that it doubles the amp-hours. So if you have two 50Ah batteries, you have 100Ah capacity in total. If you have two 125Ah batteries in parallel, you have 250Ah battery capacity, and so on.
Not all RV batteries are connected in parallel. If they’re connected in a different way, it might be 6V batteries. You can connect two 6V batteries in series to create a 12V battery system, or two 12V to create a 24V.
In that case, there is a cable going from the positive terminal on one battery to the negative terminal on the second battery. Then your amp-hours don’t double, but the voltages do.
So How Big Should My Solar Panel Be?
I believe it’s a good idea to be able to recharge your batteries fully in a day full of sun. The sun is the strongest around noon, so this is when you’ll generate the most electricity. However, it’s great to use every single sun hour of the day since it will help towards recharging our battery fully.
A 100W solar panel, like the Renogy 100W (I own two of these) generates about 6 amps per hour (6-80 watts) during the peak sun hours of the day.
So if you have a 100Ah RV battery, you can charge 50% of it in a little over 8 hours (50Ah/6A=8.33). 50 is 50% of our 100Ah battery, and 6 is how many amps the 100W solar panel is generating.
In this video, I show the Renogy 100W panel and how to connect it to a camper.
We can also think about it in watt-hours. As we talked about above, a 12V 100Ah battery is 1200Wh (12*100). If our 100W solar panel generates 70W every hour, it will take a little over 17 hours to generate 1200Wh (1200Wh/70W).
If you have two 100Ah batteries wired in parallel, you have 200Ah capacity. So to recharge them from 50% would take 17 hours with a 100W panel.
Unless you knowingly have upgraded your batteries, I bet you have 100Ah or less in total, and a 100W panel will be enough to recharge your battery as long as it’s sunny.
This means that you could watch your 12V TV, run the furnace fan, use the water pump and your lights, without killing the batteries within days.
What Is The Easiest Way To Get Started?
The easiest way to get started is to buy a portable panel with a built-in solar charge controller. You shouldn’t connect a solar panel to an RV battery without using a solar charge controller since it prevents overcharging.
I recommend the Renogy 100W Suitcase with solar charge controller. These come with alligator clips so you can connect them straight to the battery.
All you have to do is set the positive clamp on the positive terminal on one side, and the negative clamp on the negative terminal on the second battery. There is also a built-in 10A fuse on the battery clamps.
Renogy 100W Suitcase with solar charge controller
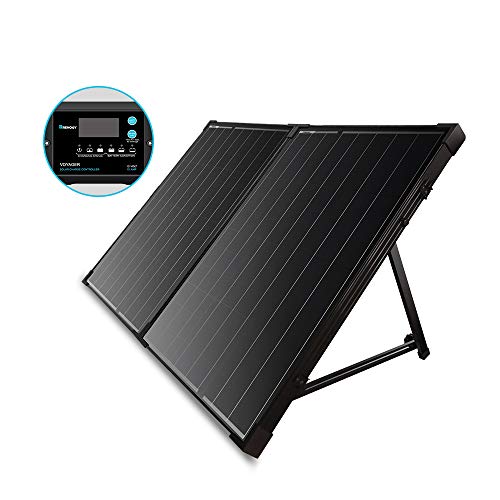
The Renogy suitcase includes a solar charge controller that will tell you the battery voltage, and how your panels are doing in terms of amperage.
The built-in kickstand makes it easy to take out the panel when it’s needed, and the whole setup is waterproof so you can leave them out. I have two of these suitcases, one with and one without the charge controller.
When we get to camp, we take these panels out and leave them out for weeks until it’s time to leave. Remember that you must make sure that the positive wire from the solar panel charge controller is the one going to your positive terminal on the battery.
Another way to go is with more portable foldable panels. The No products found. is a great option that is lightweight and easy to handle.
It comes with all kinds of adapters and outputs so you even charge USB or DC devices directly. You can either choose to use the built-in solar charge controller or not, so you can also use it with power stations that have built-in solar charge controllers.
How Do I Figure Out How Many Amps I Am Using Per Day?
An easy way to figure out how many amps you’re using out of your batteries every day, and whether a 100W panel will be either too much, not enough, or just perfect, is by doing some calculations based on how much you expect to use your 12V appliances.
If you know how many watts a device is using, divide it by 12 to get the amperage.
Here are some common 12V RV appliances and their amperages per hour. These are obviously rough estimates and several factors will play into how much electricity is used.
4W LED light – 0.3 amps
Water pump – 4 amps
DC fan – 4 amps
12V TV – 3 amps
Furnace fan – 8 amps
Propane alarm – 0.2 amps
Now let’s estimate how long we’re going to use each device every day, in hours.
4W LED light – I use 12 of my lights for about two hours = 0.3*12*2 = 7.2 amps
Water pump – We wash our hands, take a short shower, do dishes, the pump is on for about 30 min total = 4*1*0.5 = 2 amps
DC fan – We run it for an hour to cool down the camper = 4*1*1 = 4 amps
12V TV – We watch TV for two hours at night = 3*1*2= 6 amps
Furnace fan – We run the furnace for 30 minutes in the morning = 8*1*0.5 = 4 amps
Propane alarm – It’s on 24 hours a day = 4.8 amps
Based on these calculations, I will use 28 amp-hours a day.
If I had a 100W solar panel generating 6A per hour, it would take 4.67 hours of good sun to generate 28A (28/6=4.67).
Should I Upgrade My RV Batteries?
If you’ve had the same batteries for a couple of years and it appears that they can’t hold a charge anymore, it’s an easy upgrade to do. You can buy new, better batteries, that are drop-in ready.
The absolute best upgrades when it comes to RV batteries nowadays are lithium batteries like the Battle Born Lithium 12V batteries.
These can be discharged lower than 50% without being damaged, but have other limitations like not being able to charge in freezing temperatures. They might also require a new converter/charger in your camper.
Otherwise, gel or AGM batteries are popular upgrades. A 12V battery like the Renogy 12V 100Ah Gel battery is an easy drop-in replacement.
Two of these wired in parallel would give you 200Ah of battery capacity (100Ah useable if we go by the rule of thumb to not discharge them under 50%).
How Do I Make My Battery Power Last Longer Every Day?
One of the easiest upgrades you can do to your camper to make your batteries last longer is to upgrade to LED lights. I bought the SRRB 12V Replacement lights and replaced every single LED light in my travel trailer, even the stove light.
These are high-quality LED lights that will probably last longer than you will. I have lived in my camper for almost a year and we run these lights several hours a day, and none of them have had any issues.
Another way to make your batteries last longer, and this is an obvious one, is to run your furnace less at night.
Buy another blanket instead of setting your furnace at high temperature. That will save not only battery power, but it will make the battery last longer.
Can I Use my RV AC Wall Outlets If I Have A Solar Panel Connected To My Battery?
No, the solar panel doesn’t generate 120V AC power that will provide electricity to your outlets. For that, you’ll need an inverter that changes the 12V DC power into 120V AC power. You should use fuses when connecting an inverter to your batteries.
A 1200W inverter like the Giandel 1200W Pure Sine Wave Inverter could power your whole camper except for your AC and microwave.
You would have to add an inline switch on the hot wire coming from your campers converter before the circuit breaker so you could shut the converter off when you want to plug your RV into the inverter (otherwise the battery would be trying to charge itself).
Giandel 1200W Pure Sine Wave Inverter
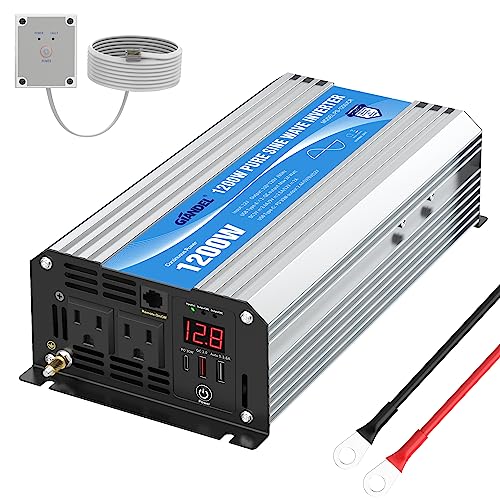
This comes with everything you need to set it up to your battery. It also comes with a remote button so you can turn it on and off from inside your RV if you’d like.
To plug it into an RV with a 30A plug, you’ll need a Camco 15A to 30A Dogbone Adapter. They also make a 50A version.
Of course, you could also run an extension cord from the inverter to power whatever devices you want to use.
If you happen to have a 12V receptacle in your trailer already, you could use a Bestek 300W Pure sine wave inverter that plugs into a cigarette lighter plug and can then power your AC devices. Just make sure the outlet can handle the amperage.
Is There An Easier Plug-And-Play System If I Want To Use The Outlets In My RV?
The easiest and quietest way to power your outlets and recharge your trailer batteries is with a portable power station, also known as a solar generator. What these power stations are is basically a 12V battery (usually lithium), an inverter, and a solar charge controller.
The solar charge controller allows you to connect solar panels to it that don’t have a solar charge controller built-in.
Whether you can plug a power station directly into your RV or not depends on how big the inverter in it is.
There is a lot to learn about solar generators and how they work, but here is a list with everything you would need to charge your electronics with solar panels while being able to plug it straight into your RV camper.
EcoFlow Delta 2 With 220W Solar Panel

Power Station With A Solar Panel – This listing of the EcoFlow Delta 2 includes a 220W solar panel that is going to be able to recharge the 1024Wh lithium battery in a full day of sunshine.
It’s expandable, charges fast, has a 1800W inverter, and a lot of ports to plug your devices into.
15A to 30A/50A Adapter – If you have a 30A plug in your camper, you’ll need the Camco 15A to 30A adapter. If you have a 50A plug, you’ll need the Camco 15A to 50A.
Let me know down below if you have any questions.
I have a marine/RV lead acid battery rated at 81 amp hours, which means I have about 40 amp hours a available, if I understand correctly. I calculate 40-45 amp hours is what I would need on a daily basis: lights, pump, fridge, heat, phantom power (realizing weather conditions are big variables). I have a 100w roof panel that came stock with my camper, which can’t keep up with the drain on the battery. The camper is wired with a plug in for additional solar. Would the addition of a 200w suitcase array (instead of 100w) more reliably charge this battery in a days time and allow me to boondock for longer stretches? I’d like an array that I can someday use with an upgraded battery, but would like to stick with the battery I have until it needs to be replaced. Thank you!