
Solar Panels Compatible With Goal Zero Yeti 1500X, 3000X & 6000X
The three Goal Zero largest power stations, also known as solar generators, are currently the Yeti 1500X, Yeti 3000X, and Yeti 6000X.
A lot of people buy these massive power stations to have as backup power in case of an emergency, but they’re also used by campers that go boondocking (dry camping) off-grid.
Related Post: Goal Zero Yeti 1500X & 3000X – First Impressions
I have one of the smaller Yeti power stations, the Yeti 1000. I plug my whole travel trailer into it with a 15A to 30A adapter, and it powers everything except for my air conditioner.
If you have a 50A camper, this is the adapter you would need.
To recharge my Yeti, I use 400 watts of solar panels. By having that many solar panels, I can use a lot of electricity during the day while the battery is also charging.
In this post, I am going to share my opinion on the best solar panels compatible with the Goal Zero Yeti 1500X, 3000X, and 6000X. While Goal Zero makes its own panels, there are also several ways to connect third-party panels, and I’ll tell you how it’s all done.
Before we get started, I need to say that I do not take any responsibility for any damage done to any solar panels or power stations.
You are responsible for making sure that your panels work, that the connection you make is correct, and that you don’t overload the charge controller in your Yeti battery.
I have been using third-party panels with my Yeti since I bought it, but you can damage them if you don’t know what you’re doing.
If you’re not sure, you can always leave a comment and tell me your setup and I’ll confirm whether you’re good to go or not based on the panels and the connections.
Let’s start by taking a look at the Yeti 1500X, 3000X, and 6000W to see what they can handle in terms of input.
Yeti 1500X, 3000X & 6000X Input Specifications
While there are some differences between these three Yeti models, the charge controllers and input ports are the same.
All three can handle solar panels rated between 14-50 volts. There are 8mm ports and an Anderson Powerpole port, where the Anderson ports are a little more capable.
By the way, recently Goal Zero started calling the Anderson port an HPP (High Power Port).
Here is what each can handle:
8mm – 14-50V, up to 10A (120W max)
Anderson Powerpole (or HPP, High Power Port) – 14-50V, up to 50A (600W max)
For this reason, you should always connect your panels to the Anderson port unless you have less than 200W total solar panels.
If you’ve reached 50A with the Anderson port, be aware that the 8mm port won’t be active unless it senses a voltage higher than from the Anderson port, according to Goal Zero.
Solar Panels Compatible With Yeti 1500X, 3000X & 6000X
All of these solar panels are compatible with the large Yeti power stations. Some of them can be connected in either parallel or series, while some can’t.
If the solar panel has a checkmark next to “Requires Additional Adapter”, you’re going to need an adapter, and I’ll show you what options you have down below.


Note: Scroll left/right on small screens to view all products in the table.
The Adapter Required For Solar Panels With MC4 Connectors
Since a lot of the panels above have MC4 connectors, we’re going to need an adapter to connect it to the Yeti. We know by looking at the inputs that we have two options, the 8mm and the Anderson Powerpole.
I recommend using the Anderson port (High Power Port) unless you have a reason not to.
The reason I recommend using the Anderson input is due to the limitations of the 8mm port. It can only handle 10A (120W), while the Anderson can handle 50A (600W).
The adapter you need to turn the MC4 connectors into Anderson Powerpole connectors is this one.
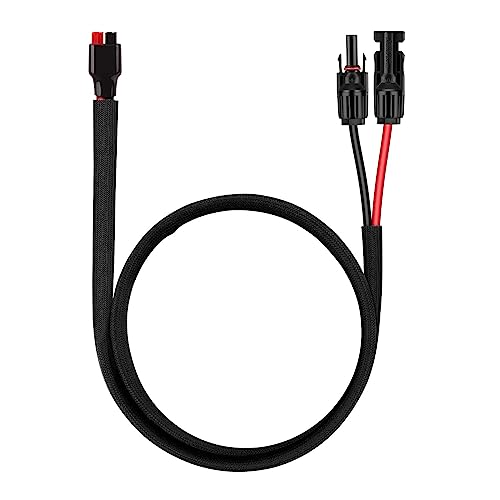
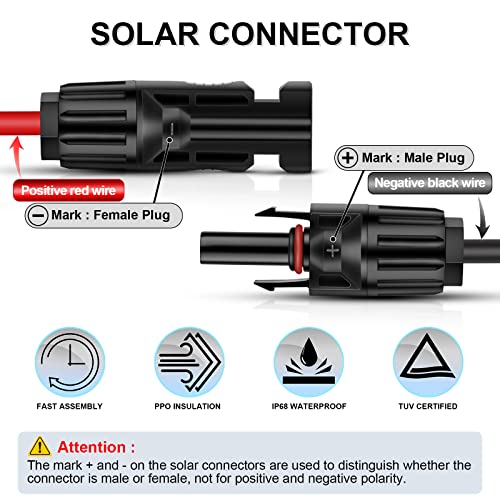
The adapter above is for solar panels with a positive MC4 male connector and a negative MC4 female connector. All of the panels with MC4 connectors above are wired that way and compatible. If you’ve purchased a different solar panel, you can check the polarity with a multimeter if you can’t tell by looking at the wires.
One thing to note about the adapter is that you’re going to have to change the orientation of the Anderson connectors to fit the Yeti.
That’s done by sliding down the sleeve protecting the connectors, sliding the connectors off of each other, turning them to the right orientation, then sliding them back on, and putting the sleeve back on. Make sure you pull by the connectors and not the wire.
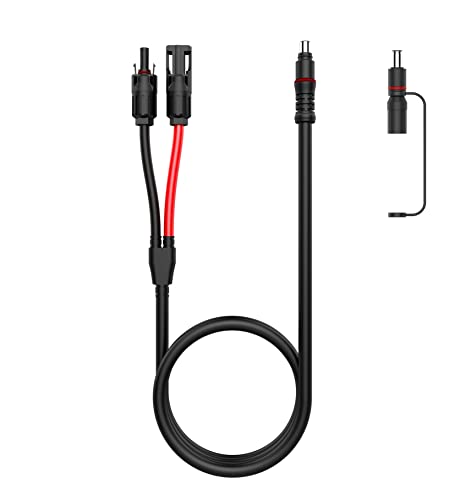
If you would rather use the 8mm input, this is the adapter you need. Just like with the Anderson adapter, this is for solar panels that have a positive MC4 male connector and a negative MC4 female connector. All of the panels in the table above with MC4 connectors are wired that way and compatible.
The 8mm adapter does not require any reassembling.
To connect either of the adapters, take the positive and connect it to the positive, then the negative to the negative. When the connection to the solar panel is made, you can connect it to the Yeti power station.
How To Combine Several Panels
There are several ways to combine panels to increase the charging speed. If you’re going to combine several panels, you need to make sure that you use wire and adapters that are thick enough to handle the total amperage.
If the panels have MC4 connectors you can either use a parallel, a series, or a series-parallel connection.
If the panels have an 8mm connector, you can use a Goal Zero 8mm combiner and plug them into the Anderson port. This creates a parallel connection.
If the panels have an Anderson connector (High Power Port), you can use a Goal Zero Anderson combiner and plug them into the Anderson port. This creates a parallel connection.
Parallel Connection
A parallel connection will increase the amperage, but keep the voltage the same. This is done with an MC4 Y branch. These come in different sizes, depending on how many panels you want to connect in parallel.
Here is an MC4 Y branch for two panels, here is one for three panels, and here is one for four panels.
When doing a parallel connection, you take the positive wires from each panel and add them together.
Then do the same with the negative wires which are kept separate from the positives.
A 100W panel outputs around 6 amps, so two will output 12 amps, three 18 amps, and so on.
Since the maximum when using the Anderson input is 50A, in theory, you can connect up to 8 panels (48A). But we don’t have a 1-to-8 MC4 Y branch, so if you want to reach the maximum input, I recommend doing a Series-Parallel connection that I’ll go through down below.
For up to four panels, a parallel connection with the 1-to-4 MC4 Y branch is a great solution
Series Connection
A series connection keeps the amperage the same, but it increases the voltage. So if a 100W panel outputs 6A at 18V connected to another panel like it in series they would output 6A at 36V together.
To do a series connection, you take the positive from the first panel and connect it to the negative on the second. So what you end up with is a positive wire from one panel, and a negative from the second.
As we saw above when looking at the specs of the new larger Yeti power stations can handle up to 50V, which means that they finally support a series connection.
It only supports two 12V 100W panels wired in series since they would output 36V. Three 12V 100W panels would output 54V, which is too much.
Check the VMP rating of a panel to figure out how many you can combine in series before you go above 50V.
Parallel-Series Connection
A series-parallel connection combines the two above to increase both the amperage and voltage. We still need to stay below the limits of what a charge controller can handle, but you can use both to increase the number of panels you can connect.
In this case, with a charge controller that can handle up to 50A and 50V, you can do a parallel-series connection for large setups.
How Do You Decide?
So how should you combine your panels? Well, if you have two, either parallel or series works. Most people recommend doing a series connection when you have an MPPT charge controller, but you can choose.
If you have three, you should do a parallel connection. If you have four or more panels you can do a series-parallel connection.
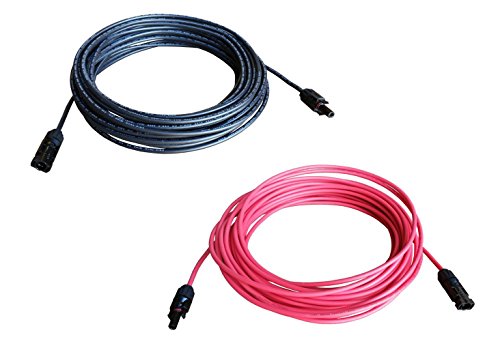
Extension Cables
I recommend using MC4 extension cables for semi-permanent or permanent installations.
The Windynation MC4 extension cables are great and reliable. They come in different lengths and gauges.
The more panels you have, the more important a lower gauge will be not only to limit the voltage drop but most importantly to make sure the wire can handle the amperage.
For non-permanent installations, you can use Goal Zero 8mm extension cables. I don’t recommend using these if you have more than 200W of solar, since they’re 16 gauge and you’ll notice the voltage drop.
Frequently Asked Questions
I Want To Add More Solar (More Than 600W) To My Yeti 1500X/3000X/6000X, What Can I Do?
If you’ve maxed the input of what the charge controllers can handle on these, you can add another Goal Zero MPPT charge controller to allow another 360W.
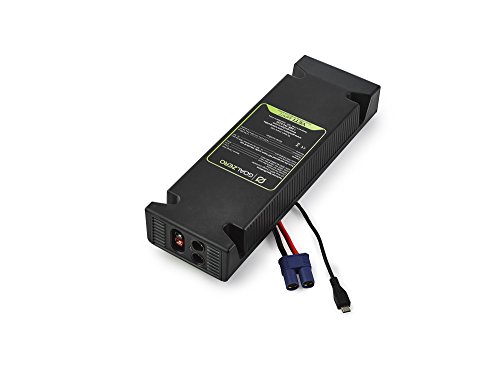
This is a so-called expansion module that can be installed on the Yeti. All you have to do is remove the plastic panel on the upper right corner and connect two cables.
The MPPT charge controller has two 8mm ports and one Anderson Powerpole port.
Note that this charge controller can only handle up to 22V, so you’re not going to be able to connect solar panels paired in series. Again, you need to connect the panels in parallel if you want to use the external MPPT expansion module.
It’s fine to connect several panels in parallel.
Can I Monitor How My Panels Are Doing In Addition To Checking The Yeti Display?
I use a No products found. to monitor volts, amps, and watts. It’s easy to connect between the panels and the Yeti, and will give you a more accurate number than the Yeti screen.
How Do I Connect Two Or More Goal Zero Boulder Panels?
If you have Boulder 100 panels with an 8mm connector, you can connect up to four with the Goal Zero 8mm combiner.
If you have Boulder 200 panels with an Anderson Powerpole (or High Power Port as Goal Zero calls it), you can connect up to four with the Goal Zero Anderson combiner.
How Long Does It Take to Recharge With Solar?
A 100W solar panel will generate around 70-80W in clear sunshine during the peak sun hours of the day. Depending on your location the United States, that can range from 3-7 hours per day.
The Yeti Yeti 1500X has a 1516Wh battery capacity, 3000X has a 3032 watt-hour battery capacity, and the Yeti 6000X has a 6071 watt-hour battery capacity.
With a 100W panel, that means that it will take over 21 hours to recharge the Yeti 1500X, 41 hours to recharge the 3000X and over 81 hours if you have a 6000X.
With four 100W panels, the Yeti 1500X can be charged in less than six hours, Yeti 3000X can be charged in 10-12 hours. The Yeti 6000X would need 20-24 hours.
Take these numbers with a grain of salt, since it depends on a lot of factors. Where you’re located, the weather, whether the panels are tilted or flat, temperatures, battery level, etc.
Can I Use A Solar Panel With A Charge Controller Built-In?
No, since the Yeti power stations have charge controllers built-in, you shouldn’t try to connect a panel that already has a charge controller.
If possible, bypass the controller before attempting to connect the panel.
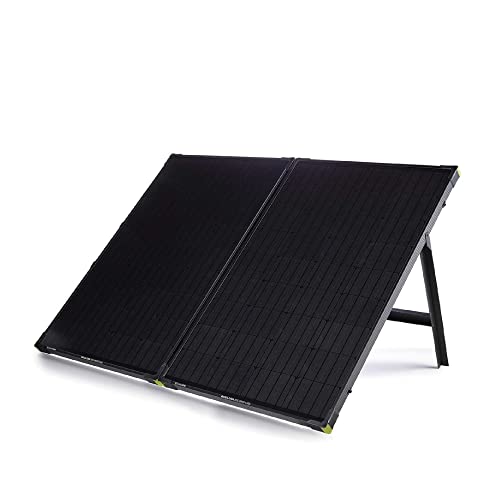
If you would like a solar panel that can charge both your 12V camper batteries and your Yeti, I recommend the Acopower 100W suitcase which has a built-in bypass. When charging your camper batteries, you’ll go through the charge controller, and when charging the Yeti you’ll connect them to the MC4 Y branch which bypasses the controller. If your RV or camper has a Furrion solar port, you can use Acopower's Furrion adapter to connect the panel to the quick-connect port on.
If you have any questions or suggestions on how to improve the article, please leave a comment down below.
I would really like to know how many boulder 200 watt solar panels can be connected in tandem on a yeti 3000x. I just purchased a 3rd thru Amazon, and if I can’t use it, I want to cancel the sale. Central ac isn’t working, so I will have to rely on a portable ac, and it takes too long to charge with the one 200 bc panel. I’m counting on this setup to get me thru any power outages as well. We also have one tank, that I think I finally figured out how to charge (this is why I’m sticking to Goal Zero products). Also just ordered the multi-panel connector that my tech friend said I would need. My husband knew how to use this stuff, but he is now in long-term care, so I’m sorta winging it to survive the summer in central CA. I am very grateful for any advice you can share. Thank You!
Hi,
With the High Power Port combiner you mention you can connect four Boulder 200 together, so you can definitely use a third, even a fourth panel.
The High Power port on your Yeti 3000X can charge the batteries at up to 600W, and three 200W panels should generate around 500-530 watts.
Best of luck to you, let me know if you have any more questions.
So what is the best (based on: speed to recharge, cost and reliability, in that order of importance) solar set-up for my 6000x in my van/camper, in your opinion? I appreciate the thoroughness of your article and the clarity of explanation. Thanks!
Separately, how do you feel about the car charging addition for the 6000x, and do you think it changes the ideal solar set-up?
FYI, van has mini fridge, portable AC / heat (vented, moveable), convection air fryer / toaster oven combo, hot water on demand, and basic lights and outlets as its uses.
Thanks!
If you’re going to mount the panels, I would get as many Renogy 175W (click to view on Amazon) as possible. Depending on how many panels you get, you’ll need an MC4 Y branch for either 2, 3, or 4 panels.
There is also a flexible 175W version.
Do you mean the regular car charger? I think the Yeti 6000X can only handle input from one port at once, unless you buy the optional MPPT module or Yeti Link, therefore I wouldn’t get it right away.
If you mean the Yeti Link integration kit it’s a different story, and if you can I would definitely get that in addition to solar panels. That way you should never run out of power.
Thank you! I didn’t mean the link, and I have already ordered it. As a follow up, What’s the maximum number of those panels you would suggest?
Please note that I am not an electrician or a professional, so to be safe I would talk to Renogy and Goal Zero before doing this.
I would get four 175W panels, then connect them in series-parallel. The reason I wouldn’t connect them all in parallel is that I haven’t found an MC4 Y Branch that can handle more than 30A, and four 175W panels will exceed that.
A series-parallel connection is when you make two pairs of series, then combine them in parallel. You’ll start by connecting the positive MC4 male connector from one panel to the negative MC4 female connector on the second panel.
The two remaining positive and negative, one from each panel, will then connect to the MC4 Y branch (click to view on Amazon).
I would also connect a 15A inline fuse (click to view on Amazon) between the positive wire and MC4 y branch. It would require two fuses, one for each string (solar pair wired in series).
Then you do the same thing with the other two panels, before connecting the MC4 Y branch to the MC4 to Anderson adapter or extension cables.
How many boulder 100 briefcases could I connect to the 6000x? I want to stack them in my apartment window to keep them from being stolen outside? I am buying property soon and these will be mounted permanently outside someday. Also, will the 6000x run a small portable AC? Thank you for all your insight and running this site for us.
Hi,
With a Goal Zero 8mm to High Power port combiner (click to view on Amazon) you can connect four Boulder 100 panels to the Yeti 6000X.
EDIT: Apparently the optional MPPT solar charge controller is not compatible with the X lineup.
I haven’t tested it myself, but I would expect it to run a small AC, like a 8,000 BTU model, for about 12-16 hours depending on temperatures and settings.
Hi,
I’ve got a Yeti 6000x and a pair of Renogy 100W panels (20.3V 4.93A). The 8mm port in the Yeti 6000x says it handles 14-50V, 10A (150W Max)
Utilizing the 8mm port on the Yeti 600x, I was thinking of wiring the 2 Renogy panels in series to get the 20.3V and stay under the 10A but does that have an effect of the panels being (2) 100 Watt panels = 200 watts and it being able to only handle 150W max?
I’d like to keep shore power plug wired through the HPP in the 6000x and not have to unplug the HPP connector for panels and connect in the shore power in the HPP every time I decide to hook up for shore power. Can’t think of an alternative where I could run shore power and panels both to HPP and stay under the desired amperage.
Thanks!
Hi,
That should work, what’s going to happen is that the charge controller will limit the current if the maximum actually is 150W.
Sounds like a good solution to me.